This post may contain affiliate links. See my disclosure for more information.
Jump to recipeIf you eat yogurt, you should give homemade yogurt-making a try. It’s not difficult, and tastes better than store bought!

Yogurt is something that I am always telling myself I should eat more of. And now that I’ve started making it myself, I finally am!
There’s something fresher about it that I just can’t get enough of. Plus, I get to play around with it a little to make it perfect for us.
I haven’t tried straining my yogurt yet to make thicker, Greek-style yogurt (which is what I usually buy if I’m buying yogurt), but it’s on the agenda! The thinner yogurt works better for us now, since I’m the only one who eats it as is. The fellas in my house will only eat yogurt if it’s in a smoothie (or in frozen yogurt form) so this is perfect.
The perfect time to try making homemade yogurt
I’m sure I’m not the only one who is trying to find projects to keep me busy and at least a little productive during this quarantining time. (If you’re looking for ideas,==> find some here)
So far I’ve made yogurt three times, and have tweaked it a bit each time. I’m going to tell you about the process I’ve been following and the tweaks so you can determine what will work best for you.
After reading several recipes and watching about 300 videos on Youtube, I decided to go with this method/recipe to start with. I’ve stuck with the general method, but made small changes based on the other ones I checked out.
The general process looks like this:
- Heat milk
- Cool milk
- Add yogurt starter
- Keep warm
- Chill
- Yum!

Yogurt-making with no thermometer
The first time I made it, I used a thermometer rigorously (ie: it caused me some stress). The thermometer was needed both when heating the milk and when cooling it.
There seem to be two camps of yogurt-makers: heat the milk to 180 degrees OR boil the milk. The first time I made it I shot for the 180. Ever since, I’ve brought it to a boil. So, no thermometer needed when I heat the milk.
When cooling the milk, you are trying to get it cool enough to add your yogurt starter without killing the good bacteria…and warm enough so the cultures can grow. The temperature that most recipes say to shoot for is 110 degrees F.
Many methods that I saw described a method of checking for the proper temperature with your (clean) pinky finger. They say you should be able to hold your finger in the milk for 10 seconds without it burning, or describe that it should feel like a baby’s bath water.
These descriptions reminded me a lot of the temperature that you shoot for when adding yeast to warm water when baking bread (and I never use a thermometer to measure that either). Once I felt pretty comfortable with that idea…no thermometer needed when I cool the milk any more.

Homemade yogurt method
I use organic, whole milk to make my yogurt. I’ve made both a half-gallon and a full gallon. For my starter, I used Stoneyfield Organic Yogurt. You can use any plain yogurt with active cultures. I wanted to get a few batches under my belt, then I set aside a small container of my homemade yogurt to use for my next starter.
After you’ve heated and cooled the milk to the right temperature, scoop a little of the warm milk into your yogurt start and mix well. Dump that mixture back into the post of warm milk and stir gently.
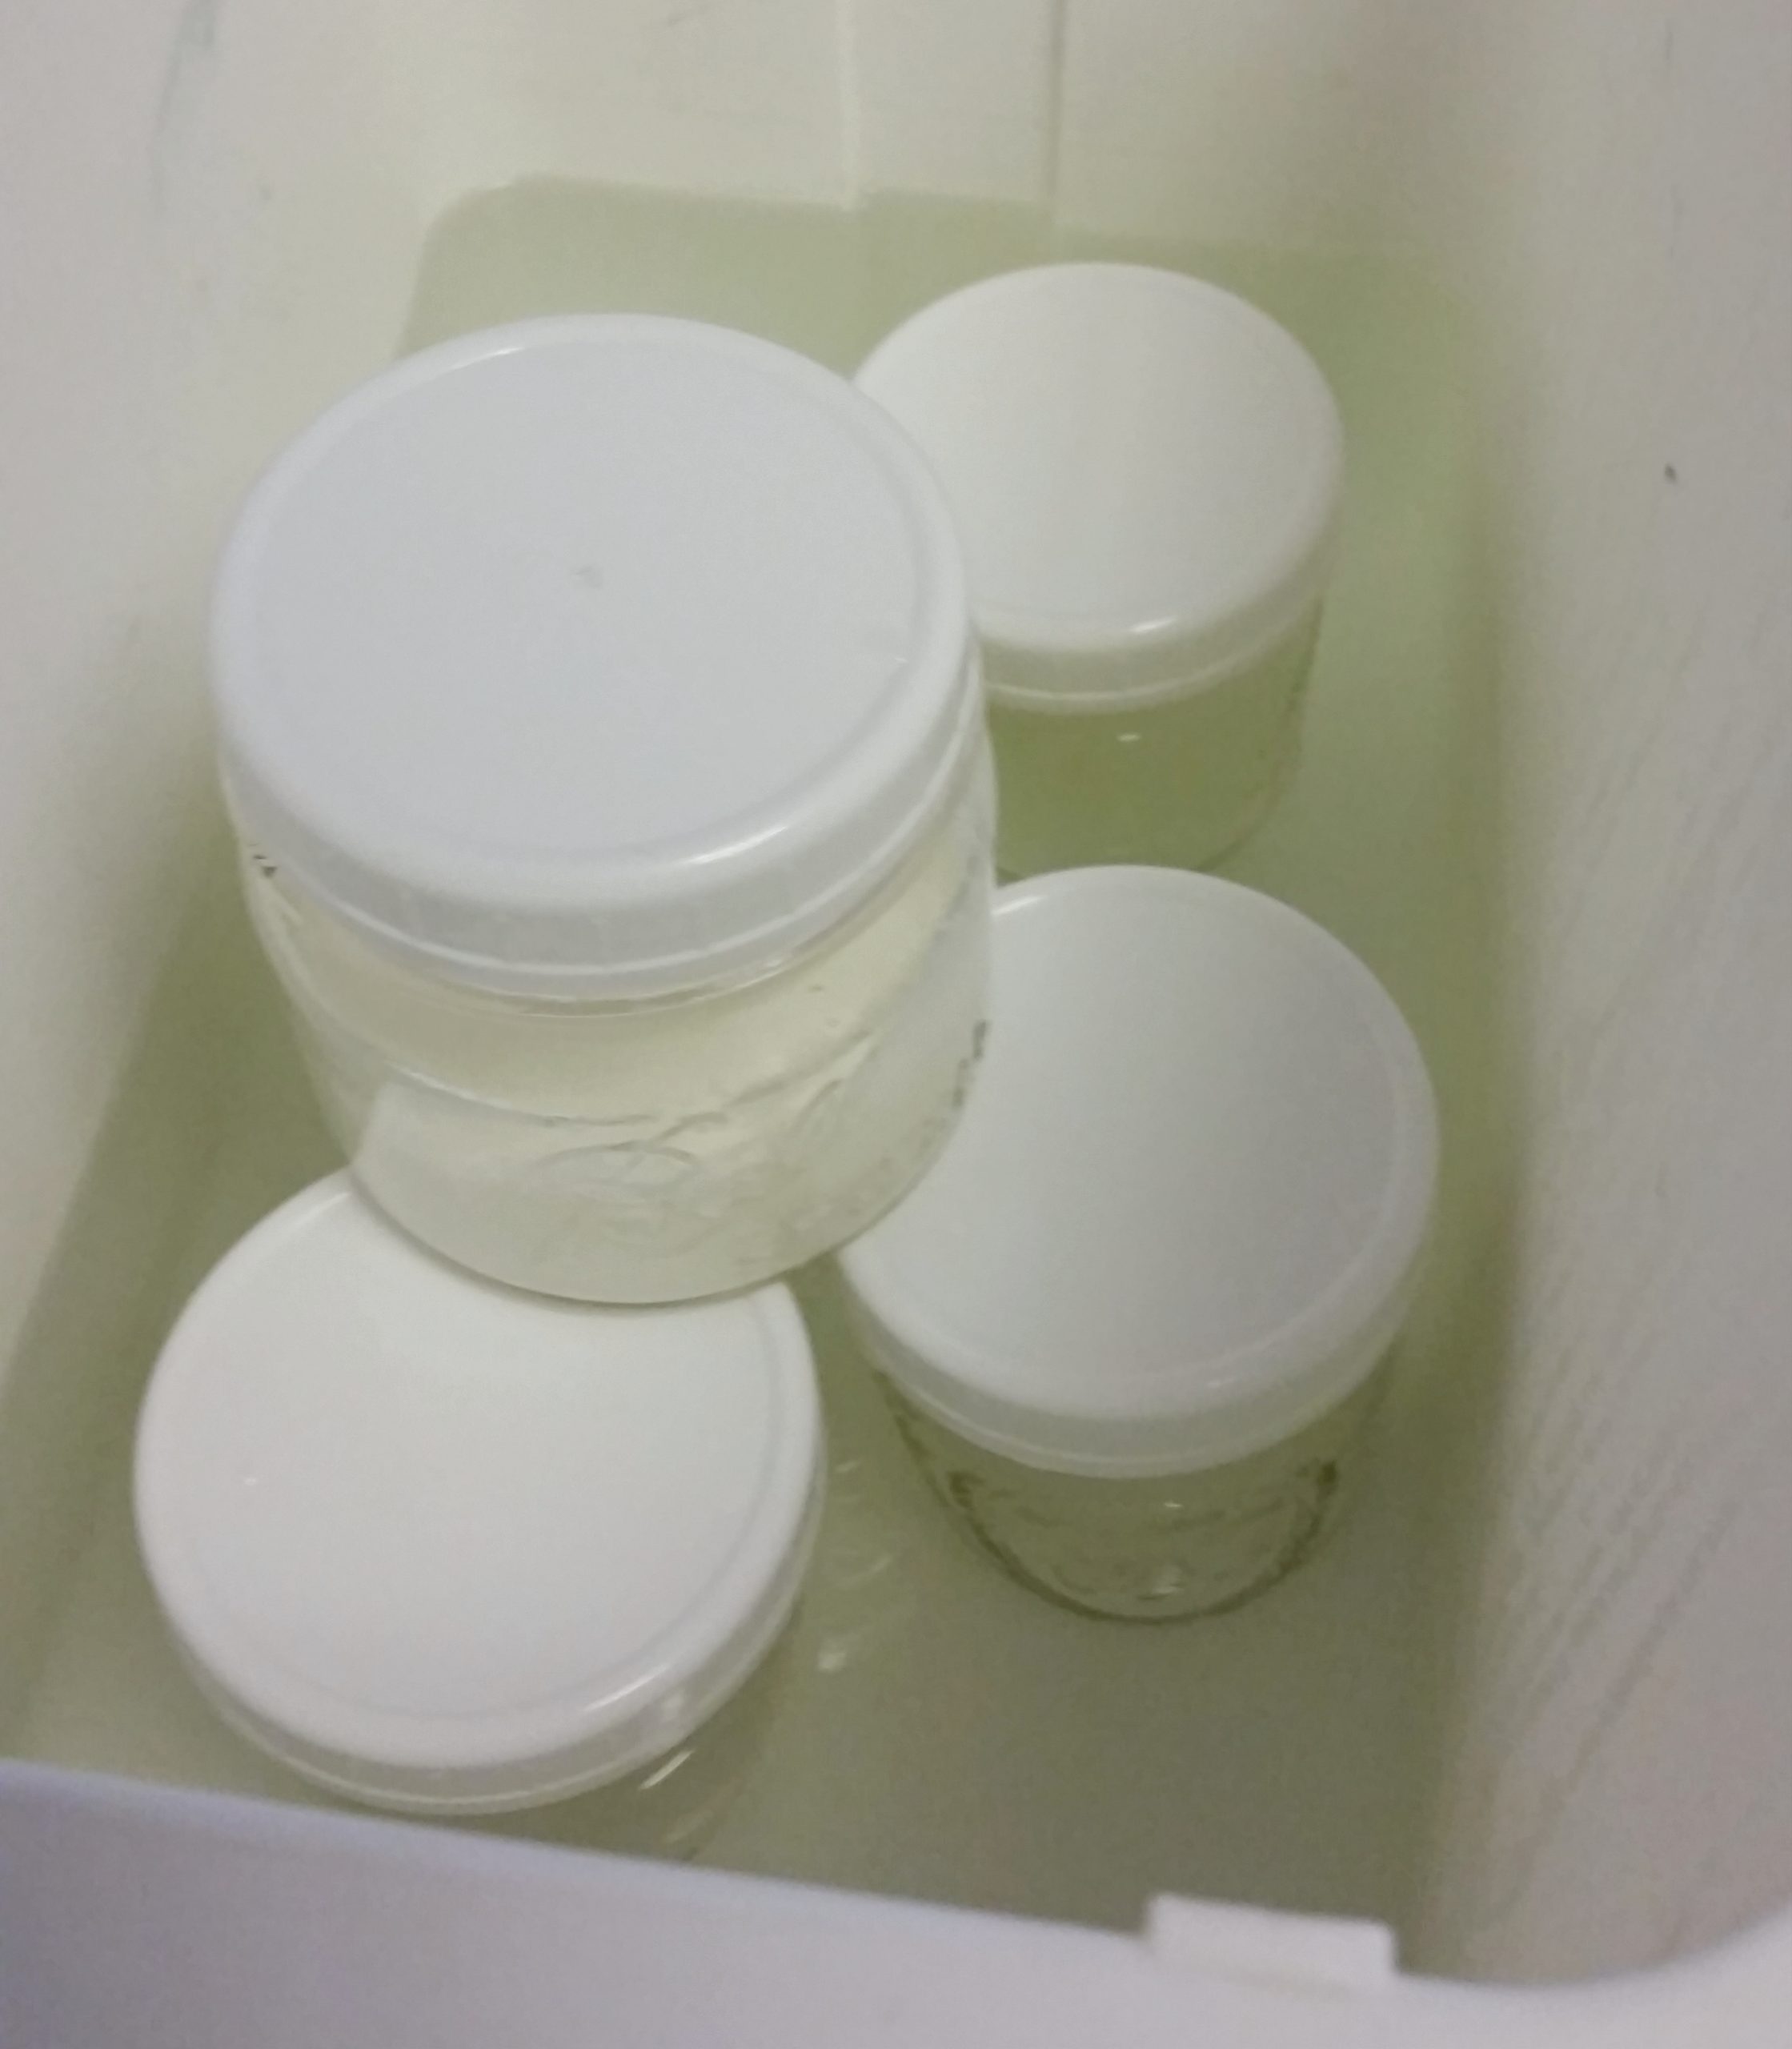
I use a ladle to scoop the milk mixture into the containers I’m using. I’ve used both pint-size jars and larger jars. Both work well, and it’s okay if you don’t fill all the jars.
Some people sterilize their containers, others don’t. I don’t. (If you’ve been here long, that shouldn’t surprise you. See my favorite method of canning tomatoes and roasting chickens). I wash my jars in the dishwasher, so am comfortable with their cleanliness.

After filling the jars and covering the jars, they need someplace warm to hang out. Some options I’ve seen:
- Wrapped in a blanket/towel in a warm place of your house.
- In the oven with the oven light left on (oven is off).
- In a cooler with warm water.
The cooler method is what I use. I run my tap water until it’s that ‘warm bath water’ temperature and pour enough around my jars to come at least 3/4 way up. Although you’ll see in the picture below that with this batch, I had one shorter jar. I sat it on top of the other ones, and the warmth of the closed cooler was enough to incubate the yogurt and it turned out great too.
The amount of time people recommend leaving the yogurt ranges from 3 hours to 12 hours. I started with three, and although the yogurt was super yummy…it wasn’t very tart at all. So I’ve been adding time to each batch. I’m currently at 5 hours and plan to do 7 or 8 the next time.
Time = tanginess
When you remove the yogurt from the cooler, or where you are incubating it, it will be thick, but not as think as it will be. You’ll want to stash it in the fridge for at least a few hours. I hear it will last several weeks, but ours hasn’t been in there longer than 2 weeks.


Ways to enjoy your homemade yogurt
I like to eat this yogurt with lots of different toppings:
- Granola (try my simple granola recipe)
- Fresh fruit
- Nuts
- A little spoon of jam
- A drizzle of honey
- Dried fruit
- Crunchy cereal flakes
- A sprinkle of cinnamon

It also makes a great addition to overnight oats/muesli. I like this recipe.

This yogurt is also fantastic for smoothies! My son and husband like to make them with a big scoop of frozen berries, some yogurt, a spoonful of jam and some juice.
I like mine best with lots of yogurt, a frozen banana and a spoon of date paste (if you haven’t tried this caramelly goodness…you must!)


One last thing…if you have an Instapot, I hear that you can make homemade yogurt in that as well. I am, perhaps, the last woman in America without one. But every time I think about it, I talk myself out of it. But if you do, give it a shot!
However you do it–I’d love to hear your yogurt-making experiences and preferences.
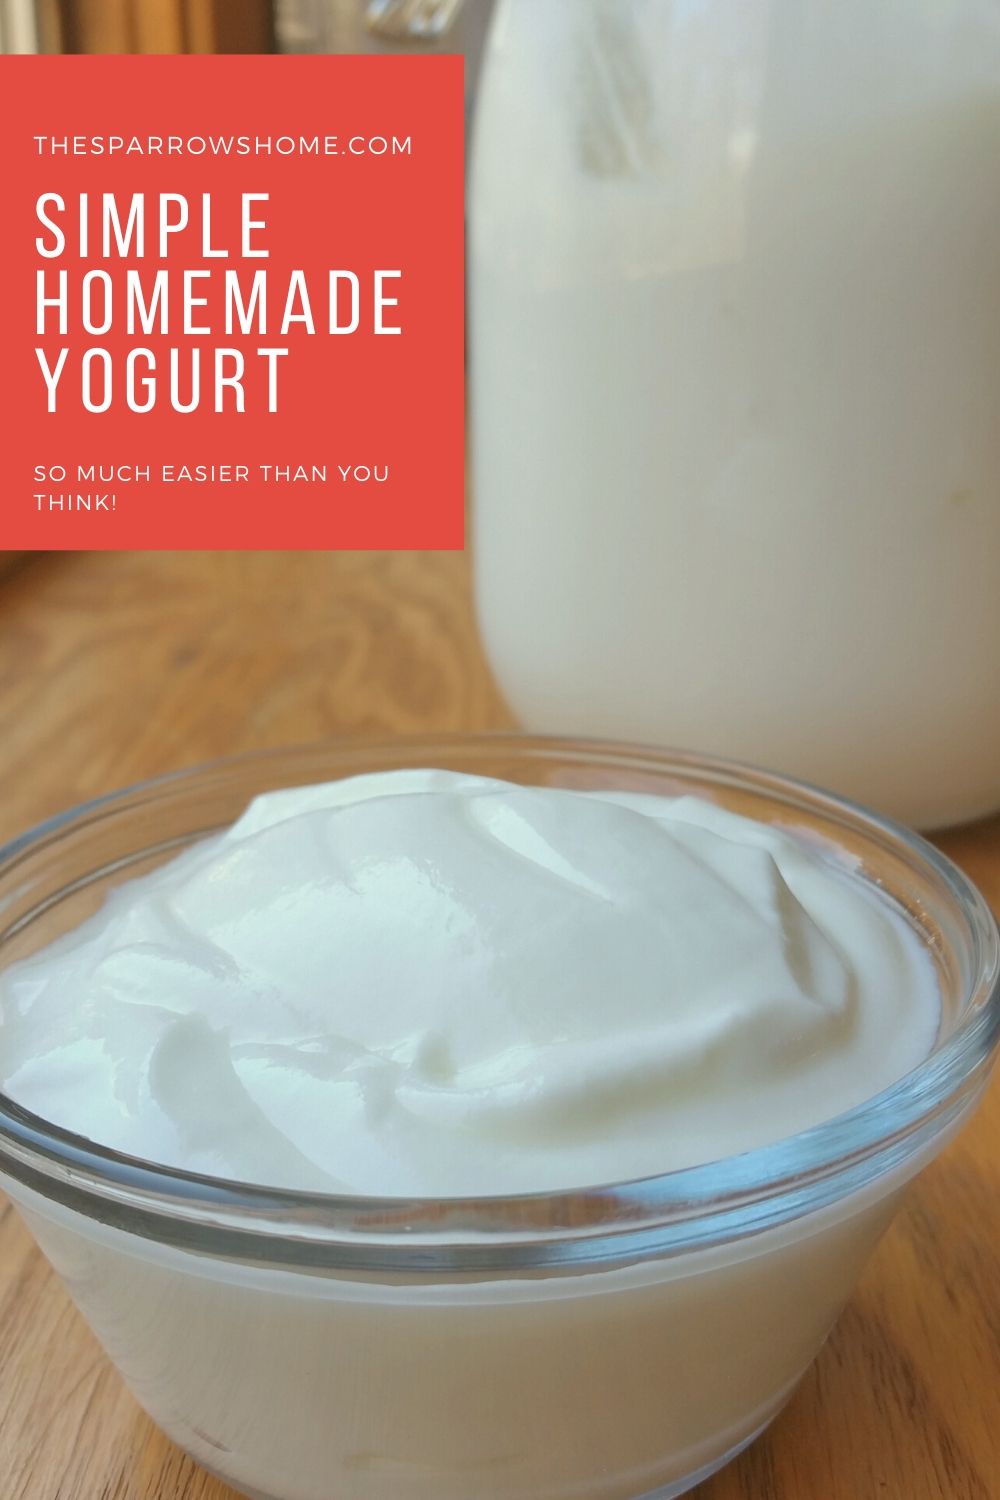
Homemade yogurt is easier than you think!

Ingredients
- 1 gallon of whole milk
- 1 cup of plain yogurt as a starter
- OR
- 1/2 gallon of whole milk
- 1/2 cup plain yogurt as starter
Instructions
- Pour milk into heavy-bottomed pot and heat to a boil over medium heat.
- Remove pot from stove and cool to warm (about 110 degrees if you'd like to use a temperature). To cool faster, set pot in a sink of ice and stir.
- Scoop some warm milk into your yogurt starter and stir/whisk until well combined.
- Pour yogurt/milk mixture back into pot and stir gently.
- Ladle mixture into jars and put lids on.
- Place jars in a small cooler and pour warm tap water (about 110 also) around the jars.
- Close the cooler and don't open for several hours (I recommend starting with 4-5 hours and then adding time as you want more tanginess).
- Move jars from cooler to refrigerator and let chill for several hours or overnight to finish thickening.


This looks so straightforward and yummy! You aren’t the last woman without an instant pot. I don’t have one yet either.😊
So good to meet another hold out! 🙂 I know people who adore them, I’m just not sure how much I’d use it.
This is great! DIY Yogurt always seemed so daunting to me, but it’s really not too hard once you get the hang of it. I’ve done it in my instant pot several times, but I might need to try this method for comparison!
Daunting is a good word–I felt the same way. I think that’s why it’s so satisfying to make! I’d love to know how the methods compare if you try this way.
I have thought many times about making yogurt, but it seems too complicated! You make this sound doable – I might give it a shot!
Oh do!
I should try this since we both love yogurt. I like Greek yogurt in particular. And no, you are not the last one to have an insta-pot, but knowing you can use that is intriguing!
When I buy yogurt I typically buy Greek as well. I still need to try straining this to see how it turns out. I’ll bet it’s yummy!